

A while back ago Microsoft announced the use of Teams templates available directly to users when creating a team. Templates have been available via Microsoft Graph for use when using teams provisioning with an custom automated process. With this feature now rolling out, templates can be managed by administrators in the Teams Admin Portal and used by end users when creating a team from the Teams client.
Many organisations has kept the native built-in process for creating teams, although most has restricted creation to a selected group of users. The gist is, all users allowed to create teams from the client can use this feature.
Before jumping into how it all works/looks, let’s look at the current limitations of these templates:

As you can see these templates are for now pretty basic and also does not include any enforcement or security / governance settings whatsoever. Everything can be customized by the user creating the team from the template. Private Channels are as of this writing not supported either.
So the purpose here is to have end-users easily creating teams with pre-populated channels,apps and tabs, not using this as an governance model.
For more information about the specific templates and their content see here:
OK, so let’s dive into how it all works.
Administrator’s perspective
By default there are a number of default templates ready for your organisation to use. As an administrator we want to manage this. Log into Teams Admin Center -> Teams -> Team templates:

Here you can view all the templates that exist:

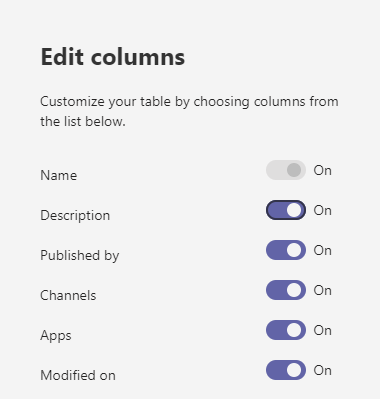
Clicking the cogwheel on the upper right lets you edit the columns:
As you can see most of these are the default published by Microsoft. These can be deleted but not edited! Lets click on the “Manage an Event” template:

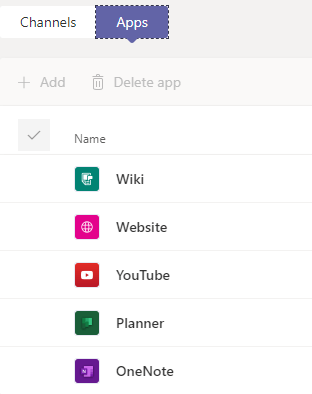
This template is made up of 7 channels and 5 pre-installed apps and some tabs. Since this is a default template, you can’t edit the settings.
If you go back to the template overview page, you can click “New” to start creating your own template. You will here have three options:

- Create a brand new template – You start from scratch
- Use an existing team as a template – You use a team as a template
- Start with an existing template – You duplicate a template and use it’s settings
Let’s start by selecting the second option, “Use an existing team as a template” You will be presented of all teams you are currently a member of. Select the team you want to use as a template:

I selected “Teamsdagen”. I can now name my template and set descriptions and locale:

Clicking “Next” will take you to the Channels and Apps settings page. Delete-edit-add any channels here and add/remove any apps you’d prefere.

Let’s add a channel by clicking “Add” below “Channels” Here you can type the name, description,set as shown for members by default and also add tabs to this channel:
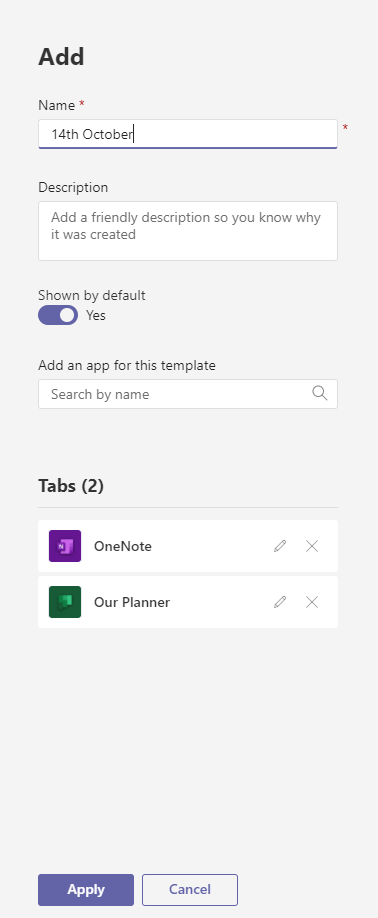
I created a channel named “14th October” and added a OneNote and a Planner tab to it. Then clicked “Apply” then “Submit” to the main page when my template is done.
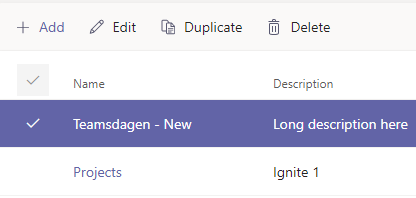
Going back to the team templates page, I can now see my newly created one:

When clicking on it I can edit any settings, duplicate or delete the template.
This duplicate button is the same as the third option shown below. Remember that the default templates can’t be modified. Instead, you use the third option below or “duplicate” to change the settings and create a custom template from it. You can then delete the default template if you want.
The first selection “Create a brand new template” takes you through the exact same options and settings as already described but with nothing pre-defined.
From the user’s perspective
Allright, now lets look how this works from an end-user perspective. I’ll start off with opening the Teams client and click on “Join or create a team”. We see the “Create team” option as usual:

Clicking this will present us with the next screen that since templates rolled out,looks a bit different:

We can select the previous options like create a team from scratch or from an existing group, but now also see the different templates.
The end-users will see all the templates we just administered from the Teams Admin Center, so if you deleted or added any, these will show here just like the “Teamsdagen-new” template we just created now is available to choose from.
Lets pick our new template!
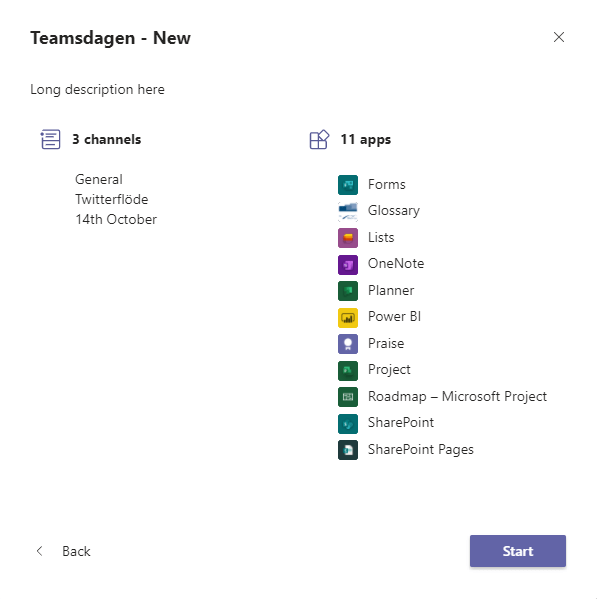
First we will be prompted with the general settings of the template. To continue click “Start”.
Next you get the option to choose if the team will be private or Public. As mentioned earlier there’s no security in place here to have templates create private only teams for example.

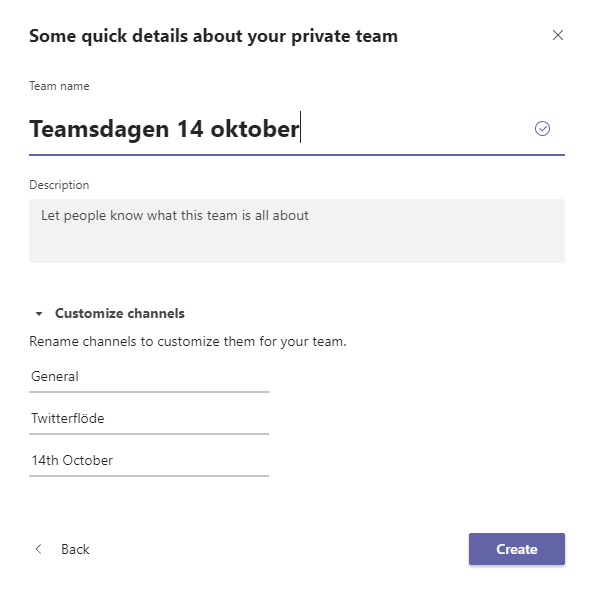
Next you have the possibility to name your team and add a description to it. You can also edit the from the template pre-defined channels. (Still not the General channel 🙂 ) When this is done -> click “Create”
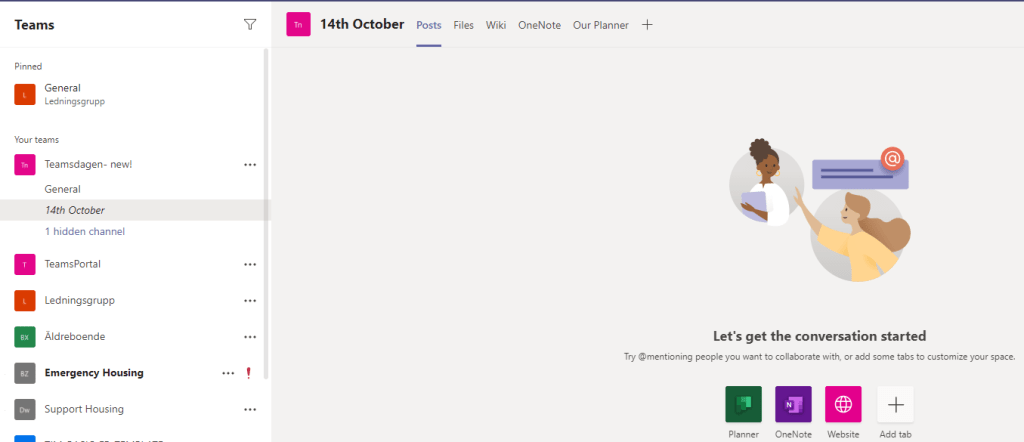
Now your new team created from our previously created template will provision. Some minutes later the team is ready to be used with all the channels and tabs you configured in the template!
Conclusion:
This feature is now rolling out and can be very handy for organisations that utlilize the native way of creating teams. Templates will provide an easy and quick way of creating teams with different purposes, with pre-created channels and tabs. Teams administrators have an easy interface from where they can manage the available templates and create custom ones that makes sense to their organisation.
Microsoft says they will add further options later on, but for now it’s rather limited from a security and governance perspective which is an important piece for many companies. So for now this isn’t an option to custom built provisioning workflows levaraging Microsoft Graph and powershell to include naming standards, sensitivity labels and expiration policys for example. Also the tab provisioning is limited since you need to manually configure the tabs from within the team.
Thank you for reading!
Leave a comment or contact me on Twitter if you have any questions or comments.
